Sowing seed
Plan Ahead.....
1. Keep records of when you sow. Know your last frost date.
An often overlooked part of growing for any home gardener is that of keeping records. It is some thing that is really worth doing as the sowing dates will be different for someone living in Cornwall to the Midlands to Scotland depending on your Last Frost Dates.
At SimplySeed, we have recorded when the seeds are sown, and when the plants are ready for transplanting each year since the 1990's. These records help us make any changes for the next year to ensure we are getting the plants ready for when we need them. Granted each years weather conditions are different, but good sowing records will help you get plants ready to around a 2 week time spot.
Don't start your seeds too early, especially tomatoes! Most annual flowers and vegetables should be sown indoors about 6 weeks before the last frost in your area.
2. Store Seeds Properly.
Please, please, please don't keep seeds in the greenhouse then expect to use them the next year.
Seeds are a perishable item, and when not treated properly, their viability will quickly decline. Try to keep seeds in a cool, dark location with low humidity. Very nearly all our packets are resealable and its best to squeeze the air out the packet before closing.
Don't however expect all seeds to last the same, some such as carrots only last a couple of years before its best to buy new seed, whereas others such as courgettes can still be viable after 7 years.
Bare in mind - there's no such thing as out of date seeds, the germination % will fall off as the seed gets older, but if you are happy to sow 3 seeds per cell to get a few plants, then it is still useable provide you stored properly. There's only one way to find out - sow some and see!
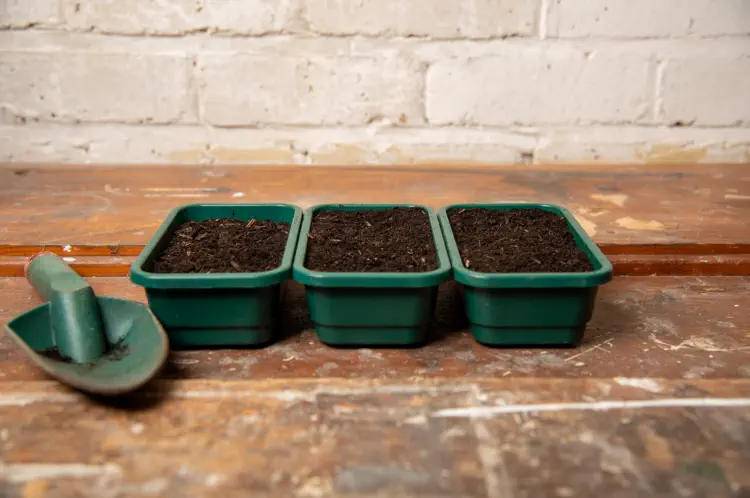
3. Pick your Sowing Containers and Clean them well.
In our opinion plastic pots and containers are the best choice when starting seeds. They retain moisture in the soil more consistently and are easier to clean. In general small seeds are best sown into shallow cell trays then potted on once big enough to handle, whilst larger seeds can be sown into larger cell trays or direct into 9cm pots.
It is definitely worth investing in some cell trays, preferably not the tiny ones, but cells 1.5cm square are ideal. Plants that resent root disturbance when transplanted are best sown into small, individual containers like cell packs or pots. Recycled plastic containers, like empty yogurt or margarine tubs, work well, too, provided you've poked holes in the bottom for drainage. No matter what type of container you use, it must be clean and free of pathogens. To sanitize a container, soak it in a 10 percent bleach solution for 15 minutes and let it air dry.
4. Use a Good Quality Seed Compost
Using a good quality, properly stored seeding compost, can make the difference between success and failure.
Definitely do not use compost that has been sitting outside all winter in a wet bag as this will be a source of soil bourne diseases. This also applies to compost bought from Garden Centres, we are amazed how many still have their Seed Composts on a pallet outside in the elements. Find a supplier who stores it under cover.
Good seed compost tends to be more expensive. One way of getting round this is to half fill your sowing containers with Multipurpose (again stored properly) and then top off the container with your seed compost. This also has the advantage of having a more open compost at the bottom, which will encourage root development, as the plants grow.
5. Cover the seeds.
You have 2 choices which will depend on the type of seeds you are sowing....
Cover with vermiculite - Made from two naturally occurring minerals, vermiculite has unmatched natural talents in seed-starting mixtures: It can absorb and retain several times its own weight in moisture while still holding some oxygen.
Cover trays with plastic to keep the moisture level constant, essential for pelleted seeds that prefer a higher humidity, and seeds that require light to germinate.
6. Label, before you sow.
Ok, yes we know it sound daft, but get rid of the label and all tomato seeds look the same, not only that but this also applies for Brassicas, Cucumbers, Courgettes, Marrows, etc - the list could get very long. We've made this mistake more than once, so save yourself the hassle.....
Ideally open one packet at a time, and label the tray as soon as you you have sown the seed,..... before you open another packet.
Heat, Light , Water - the essentials for successful germination.....
7. Get the Temperature right.
Most seeds require temperatures of 15°C to 18°C to germinate at their best, with more exotic and pepper seeds liking into the 20's°C, so keeping seeds warm will encourages better germination. Cool soil conditions are probably the main reason behind most failures with seeds, mainly because they have been sown too early outside. Being control freaks we prefer sowing indoors, and that means better chances of success and earlier crops.
8. Light
Check your seeds daily for emergence. Once the first leaves are showing, they need to be moved to a position with good light, the glass / polythene or propagator lid should be removed to increase ventilation. A sunny windowsill is a good place to put sprouted seedlings.
Most seeds will not germinate without some form of light and once germinated will perform best with 12 or more light per day, hence why professional grower use lights. For gardeners, growing seedlings indoors is fine, place seed containers in a sunny, south-facing window and give the container a quarter turn each day to prevent the seedlings from overreaching toward the light and developing weak, elongated stems.
9. Water - Only when needed!
Oxygen is vital to the germination process. Until seedlings have leaves to enable them to use energy received from the sun, they rely on the food reserves in the seed combined with oxygen found in the soil to grow new cells. This is why you should always use a light-textured potting medium to start seeds, and why over-watering can cause seeds to rot instead of grow.
Using room temperature water, apply just enough water to lightly dampen the surface if it’s dry, and wait a minute or two to see if water flows through the containers and pools around the bottom. Seeds are very sensitive to the extremes of overwatering and underwatering. In addition, heavy-handed watering can disturb newly germinated seedlings.
Securing a plastic bag over the surface of a freshly sown seed pot can help to keep the moisture level constant. However, the pot must still be checked daily for moisture and germination..
10. Feed your plants.
This is probably the number one problem that people have when growing plants - they do not get to their full potential because they are not fed enough.
Most seed composts contain only a very small amount of nutrients, this will last 14 days at the most. After that it's time to begin feeding either a proper young plant food such as First Feed Young Plant Feed, or use a liquid fertiliser mixed at half the usual strength on a weekly basis.
Proper feeding will encourage your seedlings to grow strong and healthy, and will pay dividends later on.
11. Harden off before placing out side.
Once the weather is warm enough and plants are large enough to be moved outside, they will need gradual hardening off to adjust to outdoor conditions. Keep your eye on the weather though, no matter how hard you try, Tomatoes, Cucumbers, Courgettes, and a whole host of other plants are not hardy to frosts - make sure you check the seed packets to find out.
12. Sow at the Correct depth
The depth you should sow your seed as a rule depends on the size of the seed.
- Fine seed should be barely covered and are best sown on top of the compost, but with a covering of plastic to stop the seed drying out.
- Medium sized seeds may be planted to a depth of about 5mm, or alternatively sow on top of the compost and cover with vermiculite.
- Larger seeds are planted more deeply, these can be pushed into the compost down to a depth of around 25mm.
Did you find this post Useful? So will others, please like it on Facebook, or share on Twitter.
Have you any other top tips you think are worth a mention? Please leave a comment below and let us know....
All blog content on this page is copyright of SimplySeed and is not to be reproduced without prior written permission. ©

delighted to have these reminders, thank you!
Excellent advice, which I completely agree with. Thank you!
Great tips and advice looking forward to the coming season and good results
very useful advice
One very good tip is - don't use rain water to water seeds - only use tap water as this is less likely to contain pathogens
As a beginner i am open to all advice. Thankyou.
Very welcome advice. Reminders are always welcome
Really helpful, thank-you.
Useful tips. I had never thought of feeding seedlings I just move them into a potting mixture when they are big enough. I'll definitely give it a try.
Very useful to kick start the new season. Thanks.
Second year of growing fruit and veg so still a novice. Great to get basic information.
I agree, old compost is a no-go, but it is difficult to tell how old it is when bought, as unknown to the buyer it may be old stock. Maybe bags should be dated by producer.
Very useful advice. Cant wait to get started but not too soon!
Very helpful to get reminders like this for novice gardeners
Thankyou very useful advice especially the watering and feeding
I am In my eighties and a keen experienced vegetable gardener but found your growing tips very helpful.
I am also very impressed that you make the time and effort to help your customers.
Thank You.
All good Advice but not being caught out by frost is the main one
Really useful tips
I’m a newbie, now feel quite educated thanks to all the useful information on your site. Brilliant!
Excellent advice fantastic read some great tips which I will take on board thanks
Thank you for the info. I was caught out by an unexpected frost just the other day. It took my dwarf beans, my beautiful Zinnia and my fig tree. I guess this is all part of the ups and downs of growing and our unpredictable weather!